The cappuccino is one of the most beloved coffee drinks in the world. Known for its balance of rich espresso, steamed milk, and velvety foam, it’s a café classic that can absolutely be recreated in your kitchen. With the right tools and techniques, you can enjoy a barista-level cappuccino without stepping outside.
This guide will walk you through everything you need to know to prepare a creamy cappuccino at home—from choosing the right beans to steaming milk to perfection.
What Is a Cappuccino?
A traditional cappuccino consists of one-third espresso, one-third steamed milk, and one-third milk foam. It’s smaller than a latte and bolder in flavor, with a thick and creamy top.
Key Features:
- Intense espresso base
- Light, airy texture from foam
- Balanced sweetness from steamed milk
- Typically served in a 150–180 ml cup
Tools You’ll Need
You don’t need a commercial espresso machine to make a great cappuccino, but a few tools will help:
Essential:
- Espresso maker (machine, moka pot, or AeroPress)
- Milk frother (manual, electric wand, or steam wand)
- Coffee grinder (burr grinder for best results)
- Thermometer (optional, but helps with milk temperature)
- Cappuccino cup (thick ceramic holds heat well)
Ingredients
- Freshly ground espresso coffee (about 18–20g for a double shot)
- Cold milk (whole milk for best texture, but oat or almond milk can work too)
Step-by-Step: How to Make a Cappuccino
Step 1: Brew the Espresso
- Use fresh, finely ground coffee.
- Extract 1–2 shots of espresso using your method of choice.
- The result should have a creamy crema on top and take about 25–30 seconds to brew.
Tip: Use Arabica beans for smoothness or a Robusta blend for a stronger punch.
Step 2: Steam or Froth the Milk
If Using a Steam Wand:
- Pour cold milk into a stainless-steel pitcher.
- Submerge the wand just below the surface and start frothing.
- Lower the pitcher as foam forms, keeping the tip near the surface.
- Once the volume increases, plunge the wand deeper to heat the milk.
- Stop at 65–70°C (150–160°F).
If Using a Frother:
- Froth cold milk according to the device instructions.
- Heat gently in a microwave or on the stove to avoid overheating.
Your goal: creamy steamed milk with a light layer of microfoam, not stiff foam like for a macchiato.
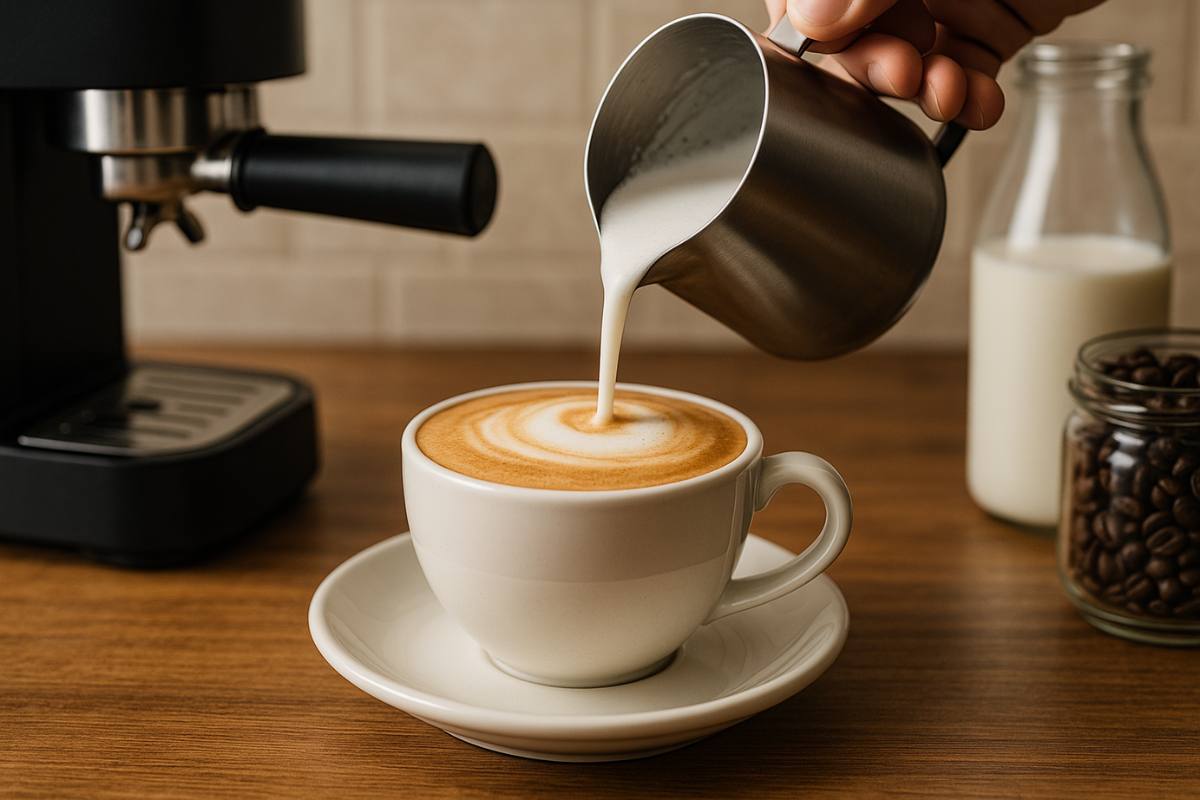
Step 3: Combine
- Pour the espresso into a cappuccino cup.
- Swirl the milk pitcher to integrate the foam and steamed milk.
- Gently pour over the espresso, holding back the foam at first.
- Finish by spooning foam on top or using a gentle pour to create art.
Latte Art Basics (Optional)
Want to get fancy?
- Start your pour high, so the milk cuts through the espresso.
- Lower the pitcher as you fill the cup, increasing flow to let the foam rise.
- Practice designs like the heart, rosette, or tulip.
- It takes practice, but adds a wow factor.
Cappuccino vs. Latte vs. Flat White
| Drink | Espresso | Steamed Milk | Foam | Cup Size |
|---|---|---|---|---|
| Cappuccino | 1 shot | 1/3 | 1/3 | 150–180 ml |
| Latte | 1–2 shots | 2/3 | Thin layer | 240–350 ml |
| Flat White | 2 shots | 2/3 | No foam | 160–200 ml |
Pro Tips for the Best Cappuccino
- Use fresh beans: Ideally within 2 weeks of roast date.
- Always froth cold milk: It creates better foam.
- Don’t overheat the milk: Over 70°C (160°F) kills sweetness and creates burnt flavors.
- Use a thermometer if you’re unsure.
- Swirl the milk before pouring to ensure smooth texture.
Common Mistakes to Avoid
- Too much foam: Makes it dry or “bubbly” instead of velvety.
- Old coffee: Results in bitter or flat espresso.
- Wrong cup size: Changes the milk-to-espresso ratio.
- Skipping the swirl: Leads to clumpy or uneven milk texture.
Milk Alternatives: What Works Best?
Whole milk gives the best foam, but you can use:
- Oat milk: Most popular plant-based option; creamy and reliable.
- Soy milk: Froths well but may split with espresso acidity.
- Almond milk: Light and nutty but harder to froth.
- Barista blends: Formulated specifically to froth and steam like dairy.
Final Thoughts: Café Quality in Your Kitchen
Making a creamy cappuccino at home isn’t about perfection—it’s about learning to enjoy the process. With a bit of practice and the right tools, you can replicate the balance and texture of a professional café drink from your own kitchen counter.
From your first espresso shot to your final milk pour, each step is a chance to slow down, focus, and savor the ritual of coffee-making. Master it, and you’ll never look at coffee the same way again.